

Hey guys! Welcome to our first
Coffee + Craft
workshop. First we're going to make a coconut rhubarb latte (don't be thrown off by the rhubarb-- it's amazing!) courtesy of Denver's barista skills. Then I'm going to walk you through the quick, easy, and cheap way to build a coffee bar in your home!
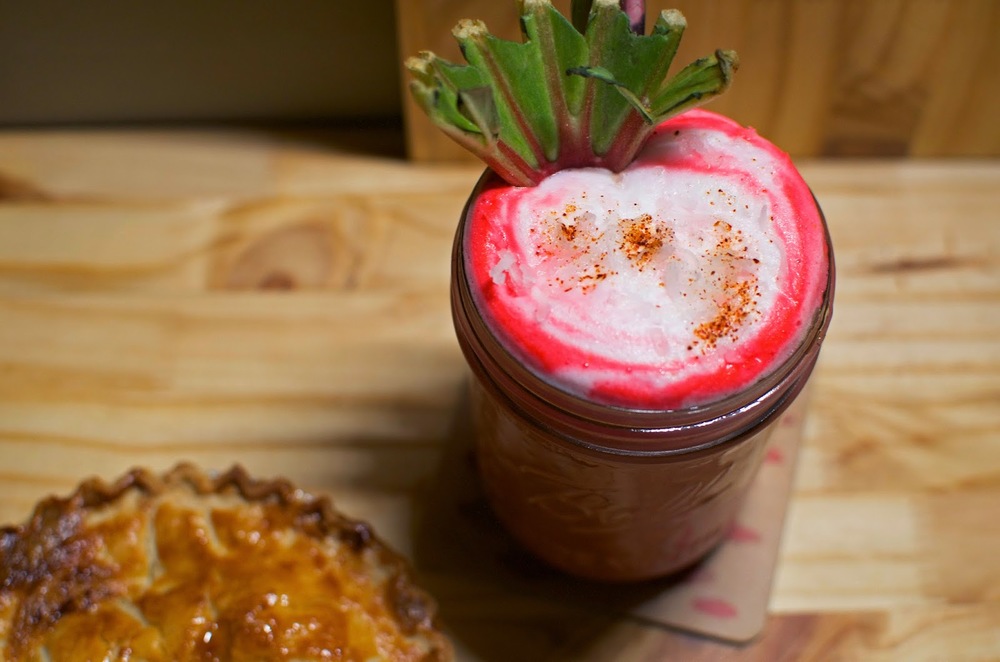
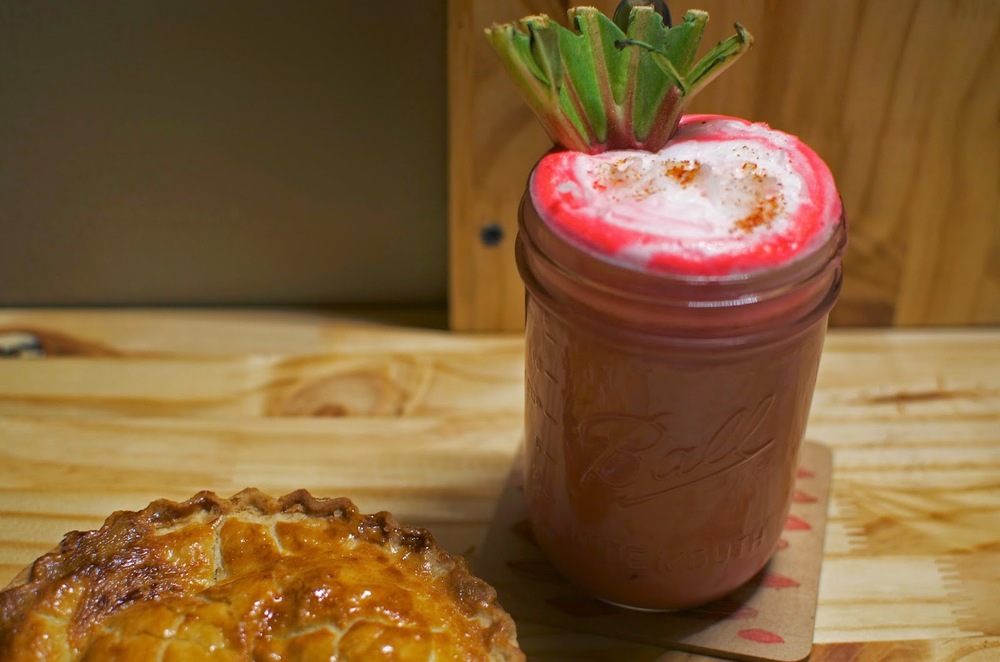
COFFEE:COCONUT RHUBARB LATTE
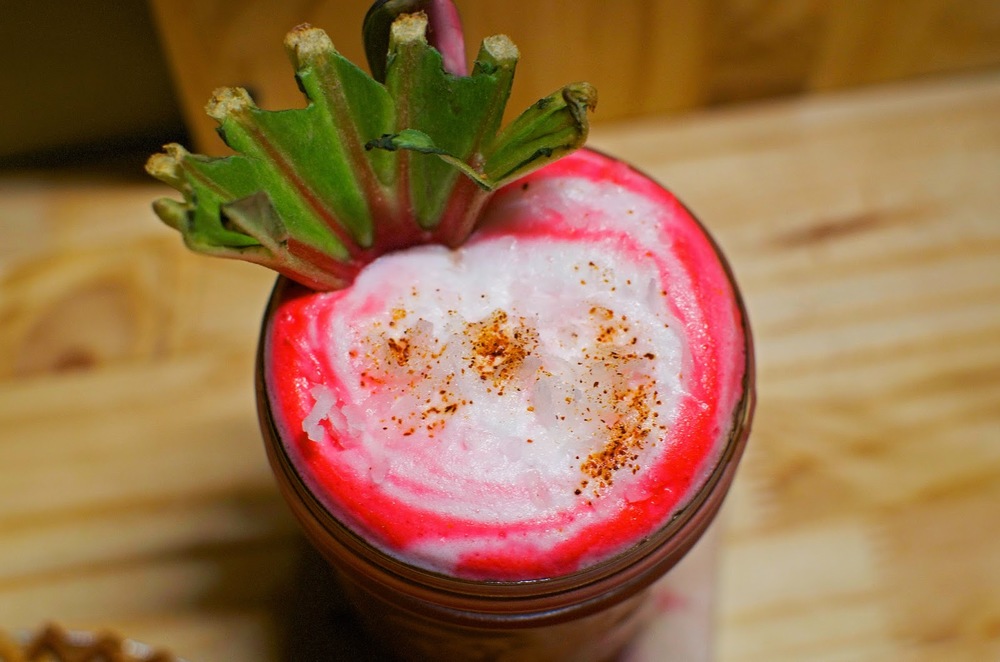
Rhubarb and coconut might just be a match made in heaven.
what you need:
1/2 can of coconut milk
1/2 cup of soy milk or whole milk (He says local dairy with milk fat would be preferable)
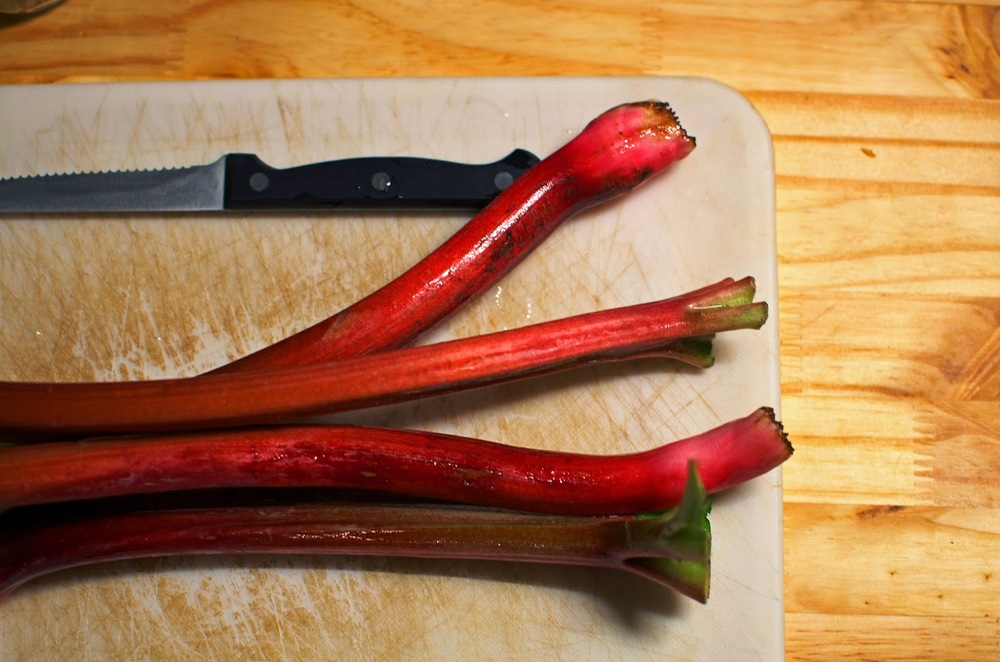
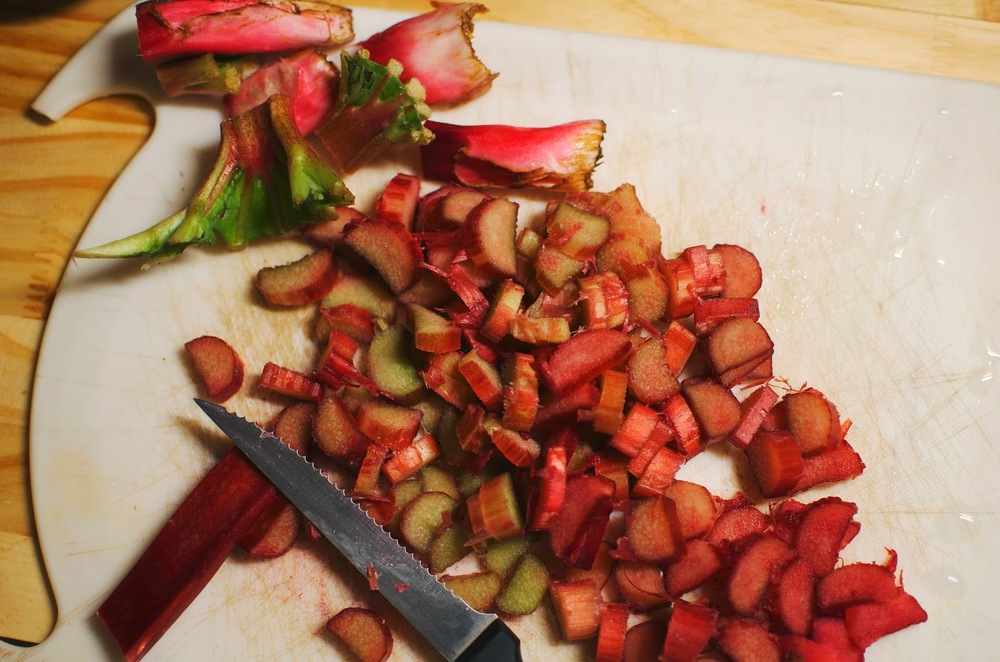
3 tsp. of rhubarb simple syrup (Denver swears by
from Tori Avey but if you can find some locally, good!)
1/2 tsp of coconut oil
2 shots of espresso (or you can use 1/4 cup of a cold brew concentrate if you're in a jam)
1 tablespoon of wildflower honey
A spritz of cayenne pepper
several drops of beet juice (optional, for richer color)
Small whisk or manual milk frother (if you have one on your espresso machine, even better!)
1-2 tsp of coconut flakes (as a garnish, optional)
for an ICED latte:
S1: After you have all of the ingredients gathered up, make two shots of espresso (if not using espresso, heat up the brew just barely-- this helps dissolve the syrup and honey.)
S2: Combine espresso and simply syrup/honey. The rhubarb will usually give everything a red tint, but the simple syrup is tasty!)
S3: Add milk and coconut milk.
S4: Stir mixture together until well blended.
S5: Pour over a cup of ice. ideally, the ice should only take up 1/3 of the cup size. If you want it to be a more dynamic red-pink rather than a muddy red-pink, add a few drops of beet juice to reach the color you desire.
S6: Garnish with coconut flakes and a light dose of cayenne pepper (optional)

for a HOT latte:
S1: After you have all of the ingredients gathered up, make two shots of espresso (if not using espresso, heat up the brew just barely-- this helps dissolve the syrup and honey.)
S2: Meanwhile, combine both milks and heat them on a stove (or your espresso machine) on low-medium heat until it starts to ALMOST boil.
S3: Combine espresso and simply syrup/honey. The rhubarb will usually give everything a red tint, but the simple syrup is tasty!)
S4: Stir 90% of the milks into the espresso/syrup mixture in your mug/cup. The additional 10% can either be manually frothed with a whisk or you can add a little cold milk and use a machine frothed.
S5: Pour frothed milk on top as a cap. Let it sit for a minute or two to cool down a bit.
If you want it to be a more dynamic red-pink rather than a muddy red-pink, add a few drops of beet juice to reach the color you desire.
S6: Garnish with coconut flakes and a light dose of cayenne pepper (optional)
Prep. Time:
After making simple syrup (~40 min), prep is typical less than 5 minutes.
+
CRAFT: AWESOME COFFEE BAR
So.....
The backstory on this is that when I was nineteen I started my first business, which was among other things, a coffee shop. That was after working as a barista at a local coffee shop for almost two years, so I really liked making coffee. I really didn't have a good prep area to make speciality drinks in our house (my coffeemaker divorced my kitchen counter long ago), so I was spending ridiculous amounts of money on drinks at local coffeehouses and Starbucks when I could have been making them at home. Then, I had the epiphany that I really needed a desk of some sort since I endure so many grueling hours rendering architecture projects on my laptop, so in the end it seemed like a pretty good idea to combine the two workspaces. Much to my boyfriend's chagrin, I drilled about 15 holes in the wall, but it's incredible to have a sturdy space to work.
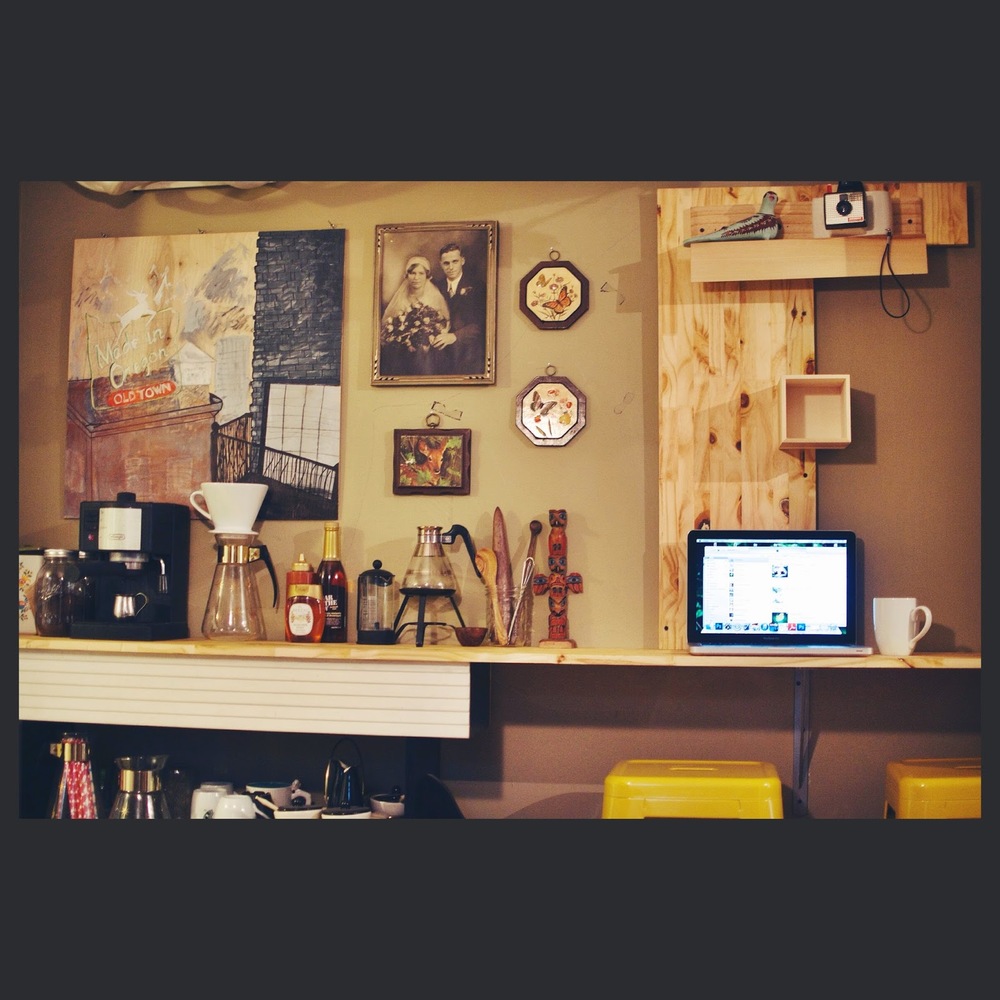
The best part was that it was cheap. And it's awesome.
How cheap it is really depends on the materials you can and can't live without. I splurged on the heavy-duty mounting brackets, but cut corners on picking a more eco-friendly, yet inexpensive wood. You may want to use a more expensive wood or a different size than we did, but definitely shop around and compare prices. The actually coffee bar itself (the wood plank and the brackets/screws) only ran us roughly $15 for the wood, $18 for the heavy-duty brackets, and $4 for a box of screws. You can, however, keep building on to it and create a workstation, which is what we did.
Gathering supplies and pre-planning.
materials needed (what we used)
1 12"x ~1" x 8' piece of glued plank wood (Lowe's has this and a plank-style version for around $10-20)
1 box of coarse drywall screws
2-3 heavy duty brackets (I would highly recommend 3 if you're going over 6' in length)
1 powerful drill/screwdriver
1 stud finder or good ears
3 1/4" screws (to secure the board to the brackets)
1 bottle of Howard's Cutting Block Food-safe Prep Oil/Wax (or equivalent protectant for wood)
1 roll of paper towels or sponge
1 Tape Measure
1 Pen/Pencil to mark drill holes
1 Level
Safety Glasses
optional materials
1 12" x ~1" x 6' piece of glued plank wood
1 LED strip (ours was $40 and plugs into the wall, but there are many types in several price ranges)
1 Unfinished wood shelf (with an overhang to help block light, should you use an LED lamp- we found one at target for $8 and Ikea has a wide assortment, also)
1 unfinished wooden square box (we bought one at a hobby/craft store)
E 6000 adhesive (for metals and adhering wooden box to small plank)
Cute decor to spruce it up
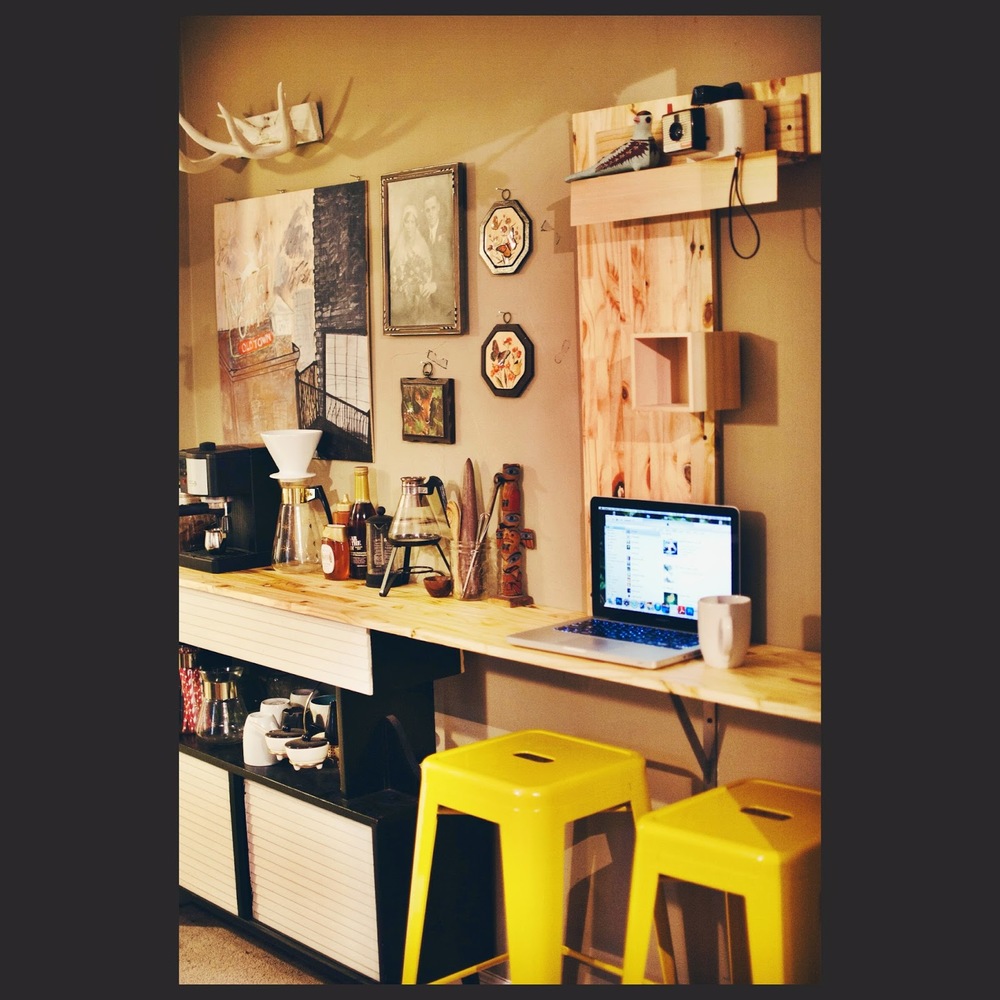
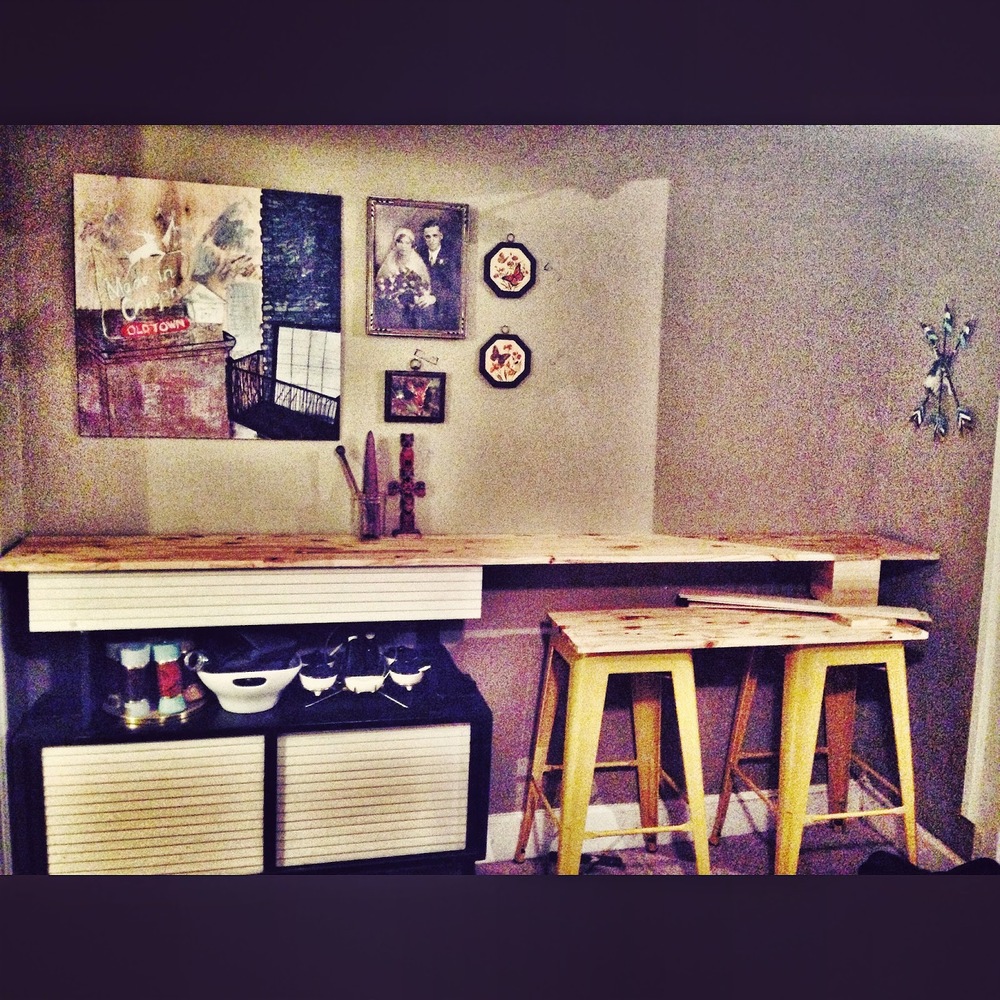
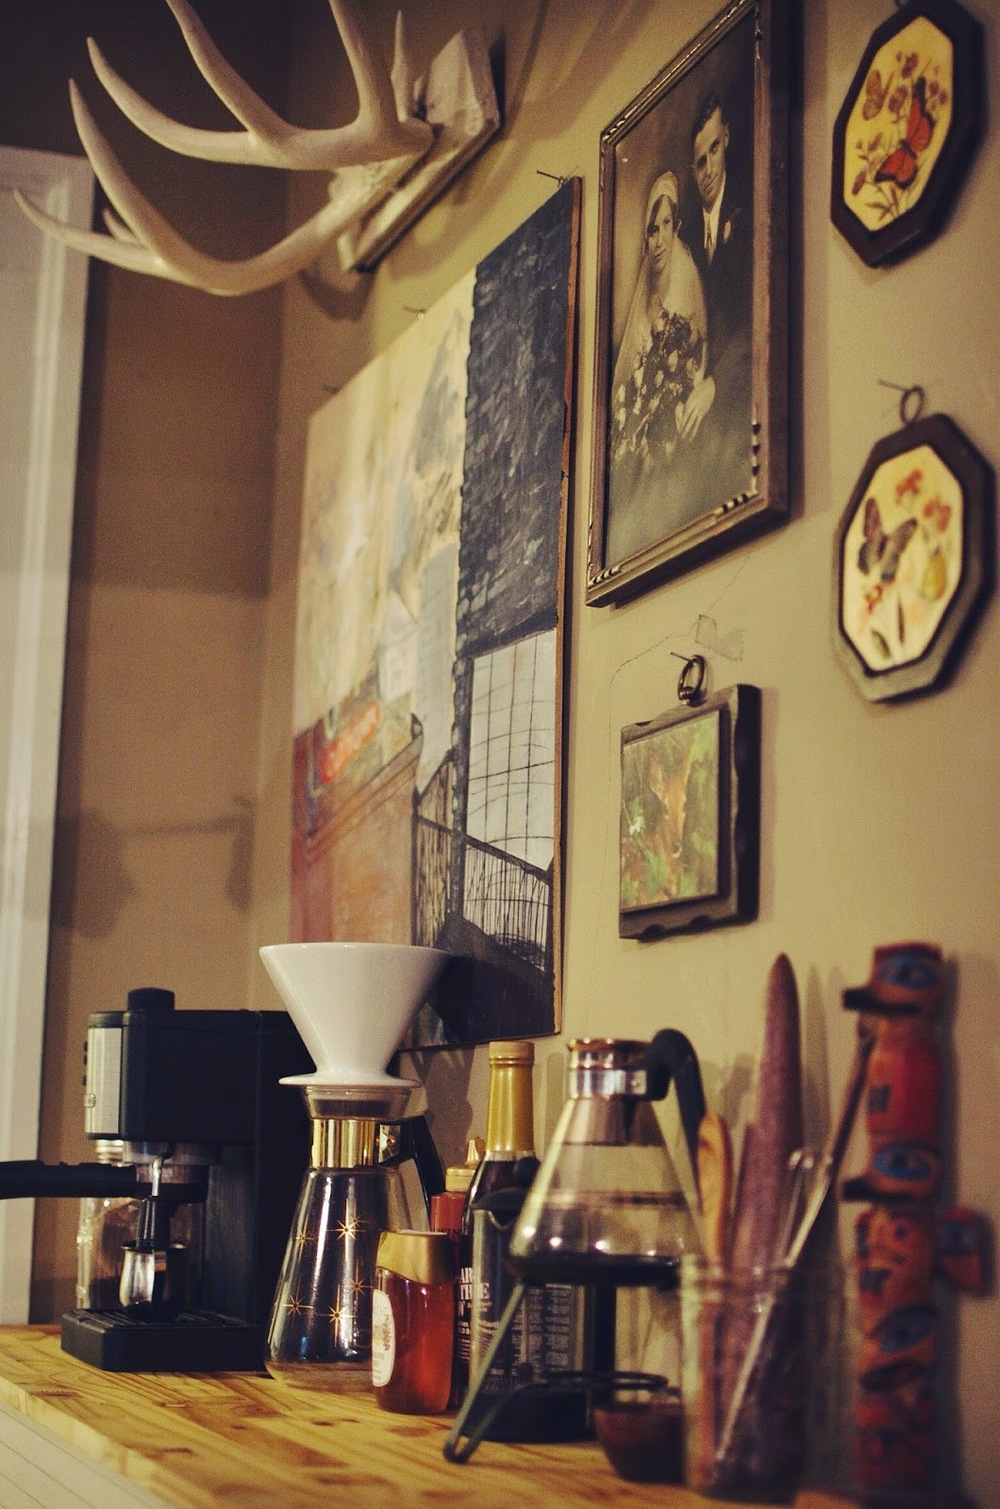
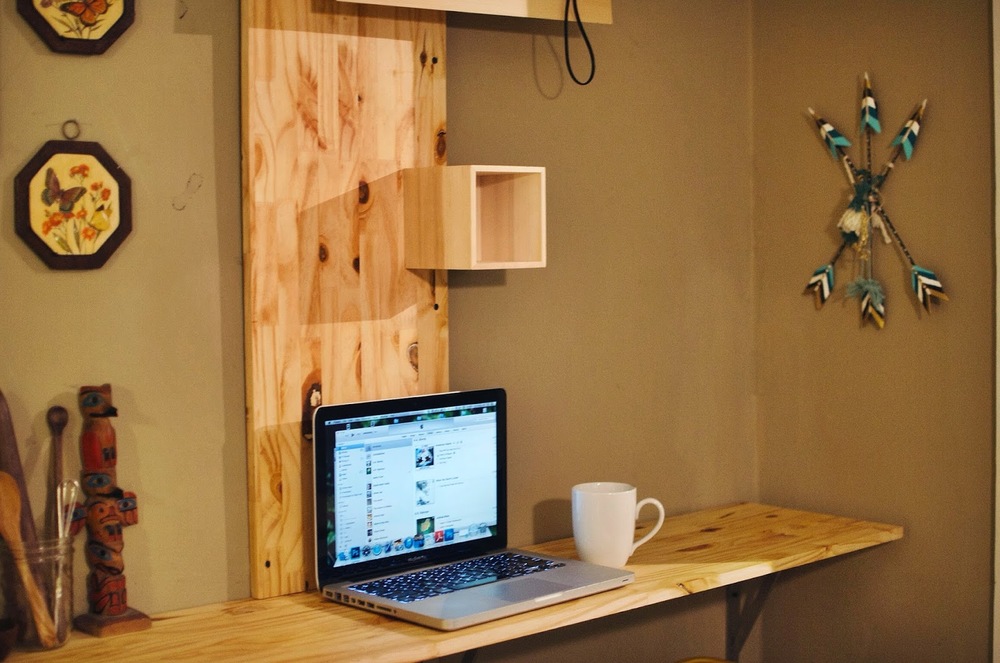
The final result.
S1:
Beginning with your measuring tape,
measure the area you are wanting to place the coffee bar at
. Ideally, there should be enough space between the wall and the bar for cords. If you would like it to be flush against the wall, make sure to cut notches/holes in the board before you attach it to the wall.
S2:
Purchase your board. Cut your board to the desired length
(Places like Lowe's typically provide a single cut in-house, so you don't even have to trim anything if you don't want to.) We went ahead and applied 3-4 coats of the mineral oil (20 min. drying time per coat) with some paper towels and let it dry overnight. If you use varnish or polyurethane, make sure to do it in a well ventilated area and allow adequate drying time so it won't be too sticky.
S3:
Once you have your board,
use the measuring tape to measure the appropriate height.
(if using chairs or stools at the bar, make sure a person can fit comfortably underneath it).
S4:
Find your wall studs. The higher the pitch, the closer to the stud you are. If you don't trust your ears, a stuff finder is a handy thing to have. Once you've found your studs, place a pencil line at the appropriate height/stud location.
S5:
Now you'll want to mount the first bracket. In a perfect world, you would be able to fit three brackets equidistantly so that the load is distributed properly, but it is really dependent on the length of your board and location of the studs (they should be spaced at the same intervals unless it is an older house.) Use your best judgment. If you can only use two brackets, try to get them as evenly spaced as possible to prevent the wood from bowing. The brackets can hold up to 500 lbs each-- the wood is not so fortunate, although it can withstand quite a bit, too. Place a tick mark on the wall where each screw hole is. These will be your guide to prime the wall space.
S6:
Take your drill and, using a drywall screw as a guide (or a small drill bit),
create holes where the tick marks were that you just made.
S7:
Now
proceed to mount the bracket to the wall
. I would recommend screwing the top hole in first, then the bottom, and then the middle (if applicable.) Follow S5-S7 for the second bracket, third, etc.
S8: Once you place your board,
use a level to verify that everything is straight
. If it isn't, you'll have to go through the process of remounting it again, which will leave more holes to fill!
S9:
Once the wood is securely in place,
take the 1/4" screws and screw them in to the top hole in the bracket to help secure the board
.
S10:
And voila!
You're done!
Go make some coffee!
S11:
If you want to go the optional route
S11A: Prime all of the wood.
S11B: After that dries, affix the square wooden box to it with a healthy amount of E6000 glue.
S11C: While that is drying, take the wooden shelf and glue the LED fixture to it with E6000. Make sure to not glue any parts that you may need to remove. We ended up using a scrap piece of wood to make a longer light shield, so if you need one, glue that on, too. Let this sit overnight.
S11D: Then, take more drywall screws, find the studs, and screw directly into the studs until it is snug against the wall.
S11E: Decorate!
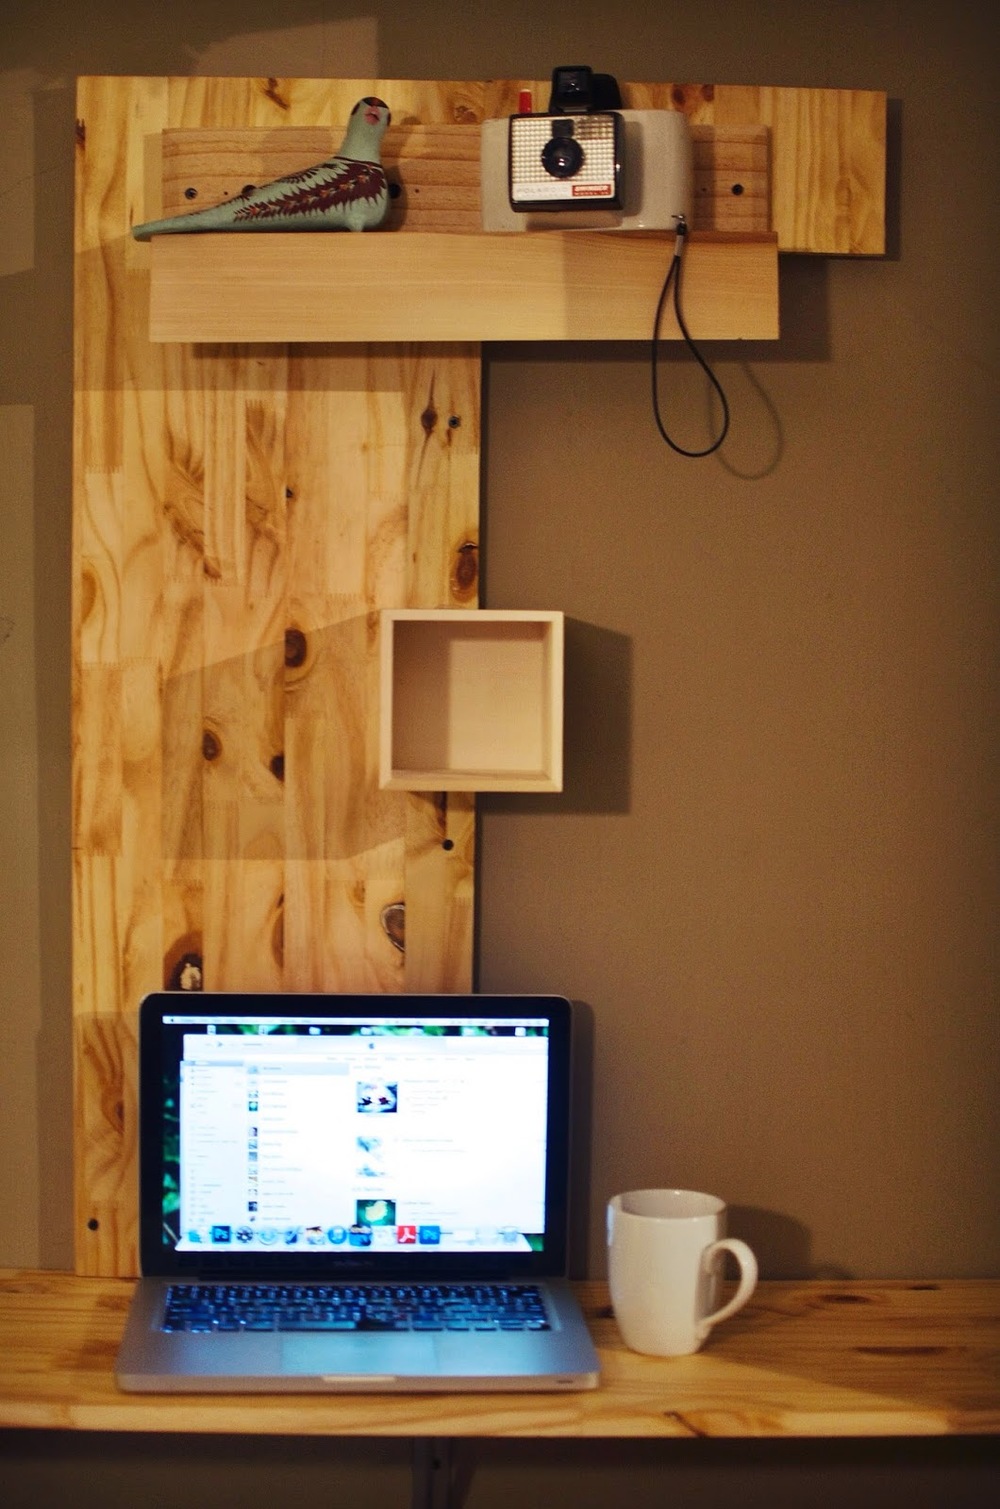
The optional workspace component.
We hope you enjoyed the first edition of
coffee + craft
. If you have any questions or are stumped on something in the instructions, feel free to leave a comment and we'll walk you through it! Thanks, guys! Happy brewing!
-Denver + Taylor