|   tamer animals    |

handmade | illustrated | found | curated design

DAILY DRIFTER: Into the Woods

Ally R.Comment

When I think of the woods, I think of sprawling forests of old growth trees, the craggy mountains of my childhood, and long walks with no destination in particular. I've always lived in cities, so it has often been a daydream of mine to venture to parts unknown. Camping with my Dad before he passed was a particularly fond memory for me. 

What images does your mind conjure up when you think of the great outdoors? Here's some little sparks of inspiration from our flickr group. Please check out these amazing artists by clicking on their names to go to their respective pages. Thank you!

xoxo,

Ally

"I am a singing of leaves II (alternate tonality)" by

rapidheartmovement

"34A_0487" by

andi singer

"tatiana" by

michel nguie

"sequoia" by

christopher mongeau

"Untitled" by

danielle christine 

"Untitled" by

sean gilchrist

"Untitled" by

imitation o f life

"Untitled" by

david paton

"Untitled" by

jamie miller

"

Quanto silêncio cabe em um sentir?" by

tuane eggers

"untitled" by

renata ibis

"Untitled" by

fitz

Follow TA!

coffee + craft: make a coconut rhubarb latte and build your own coffee bar!

Taylor A.Comment

Hey guys! Welcome to our first

Coffee + Craft

workshop. First we're going to make a coconut rhubarb latte (don't be thrown off by the rhubarb-- it's amazing!) courtesy of Denver's barista skills. Then I'm going to walk you through the quick, easy, and cheap way to build a coffee bar in your home!

COFFEE:COCONUT RHUBARB LATTE

Rhubarb and coconut might just be a match made in heaven.

what you need:

1/2  can of coconut milk

1/2 cup of soy milk or whole milk (He says local dairy with milk fat would be preferable)

3 tsp. of rhubarb simple syrup (Denver swears by

this recipe

from Tori Avey but if you can find some locally, good!)

1/2 tsp of coconut oil

2 shots of espresso (or you can use 1/4 cup of a cold brew concentrate if you're in a jam)

1 tablespoon of wildflower honey 

A spritz of cayenne pepper

several drops of beet juice (optional, for richer color)

Small whisk or manual milk frother (if you have one on your espresso machine, even better!)

1-2 tsp of coconut flakes (as a garnish, optional)

for an ICED latte:

S1: After you have all of the ingredients gathered up, make two shots of espresso (if not using espresso, heat up the brew just barely-- this helps dissolve the syrup and honey.) 

S2: Combine espresso and simply syrup/honey. The rhubarb will usually give everything a red tint, but the simple syrup is tasty!)

S3: Add milk and coconut milk. 

S4: Stir mixture together until well blended.

S5: Pour over a cup of ice. ideally, the ice should only take up 1/3 of the cup size. If you want it to be a more dynamic red-pink rather than a muddy red-pink, add a few drops of beet juice to reach the color you desire.

S6: Garnish with coconut flakes and a light dose of cayenne pepper (optional)

for a HOT latte:

S1: After you have all of the ingredients gathered up, make two shots of espresso (if not using espresso, heat up the brew just barely-- this helps dissolve the syrup and honey.) 

S2: Meanwhile, combine both milks and heat them on a stove (or your espresso machine) on low-medium heat until it starts to ALMOST boil. 

S3: Combine espresso and simply syrup/honey. The rhubarb will usually give everything a red tint, but the simple syrup is tasty!) 

S4: Stir 90% of the milks into the espresso/syrup mixture in your mug/cup. The additional 10% can either be manually frothed with a whisk or you can add a little cold milk and use a machine frothed. 

S5: Pour frothed milk on top as a cap. Let it sit for a minute or two to cool down a bit. 

If you want it to be a more dynamic red-pink rather than a muddy red-pink, add a few drops of beet juice to reach the color you desire. 

S6: Garnish with coconut flakes and a light dose of cayenne pepper (optional)

Prep. Time:

After making simple syrup (~40 min), prep is typical less than 5 minutes. 

+

CRAFT: AWESOME COFFEE BAR 

So.....

The backstory on this is that when I was nineteen I started my first business, which was among other things, a coffee shop. That was after working as a barista at a local coffee shop for almost two years, so I really liked making coffee. I really didn't have a good prep area to make speciality drinks in our house (my coffeemaker divorced my kitchen counter long ago), so I was spending ridiculous amounts of money on drinks at local coffeehouses and Starbucks when I could have been making them at home. Then, I had the epiphany that I really needed a desk of some sort since I endure so many grueling hours rendering architecture projects on my laptop, so in the end it seemed like a pretty good idea to combine the two workspaces. Much to my boyfriend's chagrin, I drilled about 15 holes in the wall, but it's incredible to have a sturdy space to work.

The best part was that it was cheap. And it's awesome.

How cheap it is really depends on the materials you can and can't live without. I splurged on the heavy-duty mounting brackets, but cut corners on picking a more eco-friendly, yet inexpensive wood. You may want to use a more expensive wood or a different size than we did, but definitely shop around and compare prices. The actually coffee bar itself (the wood plank and the brackets/screws) only ran us roughly $15 for the wood, $18 for the heavy-duty brackets, and $4 for a box of screws. You can, however, keep building on to it and create a workstation, which is what we did. 

Gathering supplies and pre-planning. 

materials needed (what we used)

1  12"x  ~1" x 8' piece of glued plank wood (Lowe's has this and a plank-style version for around $10-20)

1 box of coarse drywall screws

2-3 heavy duty brackets (I would highly recommend 3 if you're going over 6' in length)

1 powerful drill/screwdriver

1 stud finder or good ears

3 1/4" screws (to secure the board to the brackets)

1 bottle of Howard's Cutting Block Food-safe Prep Oil/Wax (or equivalent protectant for wood)

1 roll of paper towels or sponge 

1 Tape Measure

1 Pen/Pencil to mark drill holes

1 Level

Safety Glasses

optional materials

1 12" x ~1" x 6' piece of glued plank wood

1 LED strip (ours was $40 and plugs into the wall, but there are many types in several price ranges)

1 Unfinished wood shelf (with an overhang to help block light, should you use an LED lamp- we found one at target for $8 and Ikea has a wide assortment, also)

1 unfinished wooden square box (we bought one at a hobby/craft store)

E 6000 adhesive (for metals and adhering wooden box to small plank)

Cute decor to spruce it up

The final result. 

S1:

Beginning with your measuring tape,

measure the area you are wanting to place the coffee bar at

. Ideally, there should be enough space between the wall and the bar for cords. If you would like it to be flush against the wall, make sure to cut notches/holes in the board before you attach it to the wall. 

S2:

Purchase your board. Cut your board to the desired length

(Places like Lowe's typically provide a single cut in-house, so you don't even have to trim anything if you don't want to.) We went ahead and applied 3-4 coats of the mineral oil (20 min. drying time per coat) with some paper towels and let it dry overnight. If you use varnish or polyurethane, make sure to do it in a well ventilated area and allow adequate drying time so it won't be too sticky. 

S3:

Once you have your board,

use the measuring tape to measure the appropriate height.

(if using chairs or stools at the bar, make sure a person can fit comfortably underneath it). 

S4:

Find your wall studs. The higher the pitch, the closer to the stud you are. If you don't trust your ears, a stuff finder is a handy thing to have. Once you've found your studs, place a pencil line at the appropriate height/stud location. 

S5:

Now you'll want to mount the first bracket. In a perfect world, you would be able to fit three brackets equidistantly so that the load is distributed properly, but it is really dependent on the length of your board and location of the studs (they should be spaced at the same intervals unless it is an older house.) Use your best judgment. If you can only use two brackets, try to get them as evenly spaced as possible to prevent the wood from bowing. The brackets can hold up to 500 lbs each-- the wood is not so fortunate, although it can withstand quite a bit, too. Place a tick mark on the wall where each screw hole is. These will be your guide to prime the wall space.

S6:

 Take your drill and, using a drywall screw as a guide (or a small drill bit),

create holes where the tick marks were that you just made. 

S7:

Now

proceed to mount the bracket to the wall

. I would recommend screwing the top hole in first, then the bottom, and then the middle (if applicable.) Follow S5-S7 for the second bracket, third, etc. 

S8:  Once you place your board,

use a level to verify that everything is straight

. If it isn't, you'll have to go through the process of remounting it again, which will leave more holes to fill! 

S9:

 Once the wood is securely in place,

take the 1/4" screws and screw them in to the top hole in the bracket to help secure the board

S10:

And voila!

You're done!

Go make some coffee!

S11:  

If you want to go the optional route

       S11A: Prime all of the wood. 

       S11B: After that dries, affix the square wooden box to it with a healthy amount of E6000 glue.

       S11C: While that is drying, take the wooden shelf and glue the LED fixture to it with E6000. Make sure to not glue any parts that you may need to remove. We ended up using a scrap piece of wood to make a longer light shield, so if you need one, glue that on, too. Let this sit overnight.

       S11D: Then, take more drywall screws, find the studs, and screw directly into the studs until it is snug against the wall. 

       S11E: Decorate! 

The optional workspace component. 

We hope you enjoyed the first edition of

coffee + craft

. If you have any questions or are stumped on something in the instructions, feel free to leave a comment and we'll walk you through it! Thanks, guys! Happy brewing!

-Denver + Taylor

Follow TA!

DAILY DRIFTER: Minimal Surrealism

Ally R.Comment

Mirages in the Sahara. Solid-voids. Cemeteries and canals. 

Get it? I'm being ironically minimal. 

All kidding aside, the following are some gorgeous examples of minimal surrealism in form. 

These are some profound ways to express minimalism and surrealism combined. Sometimes they are haunting, eluding, and intoxicating. Oftentimes they are pure magic. 

xoxo,

Ally

"cementerio nueva esperanza. Lima - Perú" by

javier castro

"Klemence" by

lucile perron

"homesick" by

giuliana massaro

"Anna" by

sergey filimonov

"push the sky away" by 

Mariana Cecílio

"The loss of the purity" by

dara scully

"Untitled" by

posidonia...

"Untitled" by

heitor magno

"Untitled" by

ChihHsien Chen

"Untitled" by

alexandra moskow

"Untitled [Mama] 2014" by

george nebieridze

"_23_0988" by

Ioana Lupascu

Follow TA!

Ear to the Ground: Listen to Wishyunu’s Futuray

Denver B.Comment

Bei Yan and Tony Bertaccin of 

Wishyunu

Wishyunu is a drum and synth duo hailing from Portland, OR. With beautifully melodic electro-pop music and haunting vocals, spouses Bei Yan and Tony Bertaccini have an incredible musical synergy that gives the songs an interstitial quality, allowing you to feel as if you are standing on the precipice of a void. The tracks are dreamy yet continuously solid and with the aid of recording extraordinaire Jeremy Sherrer, the collaboration is an album full of ample talent and intrigue.

Although this 4-track EP was released in 2013, it is one of those that constantly finds its way back into my tape deck. I especially love the tracks “Sprayy” and  “Neutron” but all of them are amazing. Their earlier work was equally wonderful, but I have to say, so far this album is stellar. I, for one, look forward to seeing what the next album brings us. 

To hear more of their work, check out their bandcamp site (

http://wishyunu.bandcamp.com

). The album is also available on iTunes and they have Facebook, Twitter, and everything else so there's really no excuse if you miss this gem. 

-Denver

Follow TA!

Future Primitive: Why Thigh Gaps, Nosetraps, and Numbers Are So Overrated

Maddie C.Comment

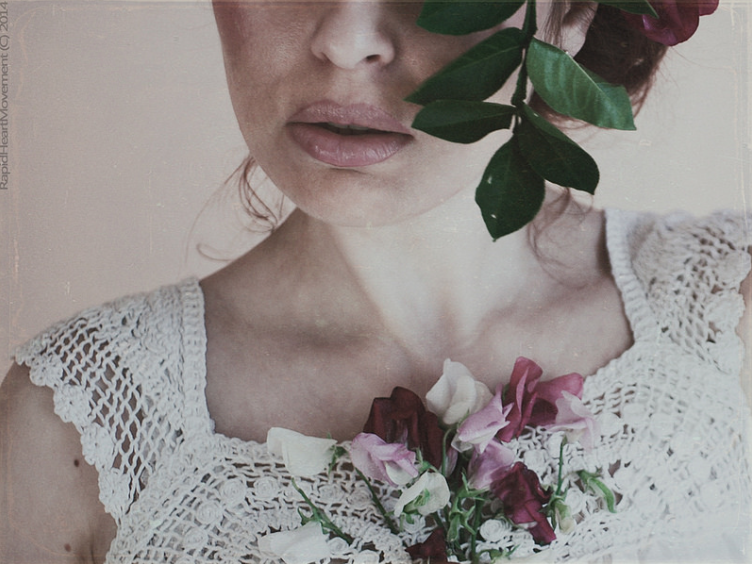
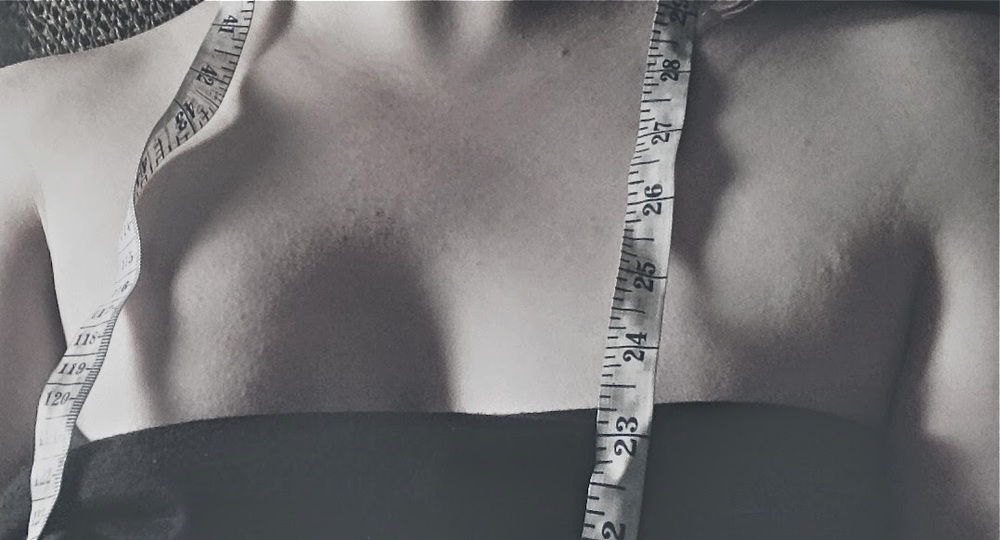
"Love is NOT  a dress size." Image sourced via TA. 

“Hey Mom! Mom! Hey Mom! Mom!....”

“Yes?”

I peered over the rim of my glasses at my daughter, to see her standing in a cute floral sundress we’d purchased for her recently.

“...Do I look fat in this?”

She placed a hand on her hip, looking up at me with earnest worry on her fragile face.

I didn’t really know how to respond. I was kind of blown away, to be honest.

I cringed

because an eight year old shouldn’t be worrying about being fat (She’s not, by the way. At all. Nor should she be. She’s EIGHT.)

I cringed

because I had just asked my husband, Clark, this same question a few nights ago about my dress when we were getting ready to go to her recital. I’m not sure where this preoccupation with body image started, or why it is a necessary evil for us to have fulfilling lives, but it stinks. While there are studies about obesity in children and it has definitely made the news, so I'm not discounting the realities of that, my kid literally looks like a twig. I can't even begin to fathom how a kid her age has 

already

 been brainwashed into thinking she is a failure somehow, yet here I am, "failing" her for the same reason by not setting a better example. 

Love is NOT a dress size.

Your value should not be based on a number or letter tag on a piece of clothing. Your value should also not be influenced by near-anorexic models or photoshopped celebrities. Your value should be based in who you are and what good you bring to the world. That’s not saying that we all don’t have days that we feel ugly or not ourselves. I’m not against wearing makeup or trying to look nice, but my eight-year-old daughter asking me this really woke me up to the example I set for her, by being just as preoccupied with image as society deems us necessary to be. 

That being said, I don’t completely blame myself. It doesn’t take a genius to realize that even the magazines geared towards kids focus on many of the same issues we deal with as adults, only a bit more sugarcoated (sometimes.) We are bombarded with media  since we leave the womb that compels us to buy things, to look a certain way, and to behave in “acceptable” ways. We are constantly competing with society's ideal of perfection rather than instilling in our children the realities and beauties of imperfection (as true perfection, if that makes any sense.) The constant state of dissatisfaction is alarming. Camille opened my eyes to the fact that, if I can’t be comfortable in my own skin, how can I instill a positive body image in my kids?

I have cellulite. I wear a dress size waaaay larger than I ever would have imagined wearing in my twenties. After having two kids and gaining 40+ pounds during each pregnancy, I’m nowhere near the size 0-2 I once was. I’m reaching that age where the idea of going for a run is the equivalent of doing math in junior high school (Definitely not a math whiz.) I have fat in areas I never even knew existed until I gained weight.  I can’t even begin to comprehend how to look at a nosetrap, but I probably would fail that, too. These are all facts.

What is also a fact is that these facts are irrelevant.

My husband loves me at 160 lbs as much as he loved me at 120. My family and friends don’t even notice the weight like I do, or feel any differently about me because of it. My kids think I’m old so they don’t exactly care, either. Society is so imperfect that it fails to see or highlight the perfections that exist in each of us. Instead, we are under a constant barrage of what we should represent rather than what we are. And this negative self-talk is destructive, especially to kids. All sexes face this type of social discrimination on some level, and we are challenged by society to simply accept it as the right way, and the only way. I remember constantly struggling with my weight, often to the point I would starve myself to stay a particular size. I was so distraught because I always thought I was too ugly, too short, too hairy, and too different to be loved. I don’t want my kids to go through that type of self-doubt.

I won’t say that I don’t find models beautiful or wish I could pull off some of the fashions they can, but I will never be a super model. I will also never be an astrophysicist. And that isn’t by choice, but simply that I don’t have it in me to be either. But the honest to God truth?

It’s okay

to be fat, or skinny, or round, or flat, or tall, or short.

It’s okay

to have a lazy eye or bad teeth or speech impediments.

It’s okay

to be who you are, and

it's okay

to cultivate a positive image of yourself without fearing the peer pressure of media.  And the reason is this: If everything and everyone were “perfect” and met the image that society places on a golden pedestal-- how boring and monotonous would it be? Society shouldn’t be concerned with the size of your thigh gap or how much cellulite a celebrity has had photoshopped off their butt. Instead of setting an often unreachable bar, it would be great if they didn’t set one at all. If the products are worth their salt, it would be great to see if they could sell themselves. If we continue to be consistently 

dissatisfied

 and seek perfection, we will never be satisfied with ourselves and the constant criticism will create a void where our self-esteem once was. 

It's a very bleak reality, but a glimmer of hope is coming through a surprising form: media. It’s honestly refreshing to see so many advertisements changing their tune and displaying people with “real” figures and so many bloggers seeking social reform and bringing attention to these issues. I don’t know what the results will be of this, if any, but for my children’s sake, I hope it is far-reaching. Fat-shaming (and skinny-shaming, for that matter) is such an ignorant way to live.

We should be more accepting of others, including ourselves. 

The fact that we've been conditioned to the point of being hypercritical is a problem in itself. So the only real solution is to stop, look around, 

and

 start focusing on being happy with what your mama (and daddy, and grandparents, etc) gave ya. 

Starting today, I am setting a good example for my kids.

No more negative self-talk, no more frowning at mirrors, and no more whining about dress sizes. And I am definitely going to start focusing more on helping my kids build a positive self-image by explaining to them that what the media dictates is unrealistic, and at best, often undesirable.  Our children deserve to keep their childhoods intact, and be able to make informed choices on how they perceive themselves and those around them. They should be focused on playing, learning, and creating-- not if they are too fat to fit into a dress.

Love,

Maddie C

Follow TA!

DAILY DRIFTER: Let's Pretend That It's Summer

Ally R.Comment

It's sunny and 78 degrees here in the good ole' town of Portland. I don't know about you guys, but I have Summer on the brain. Going to the coast, hiking in the hills, and hopefully a road trip to the desert are just some of the items on my agenda for the next few months. What do you guys have planned for your summer itinerary?

xoxo, 

ally

"the acid cat" by

Roco Perna

"Ruins N." by

Arvin Hsu (JX)

"Untitled" by

Gus Barletto

"Metals Union" by Naomi of

purple woods

"Untitled" by

Carolina Conte

"

O que há de criaturas felinas em nós" by

Tuane Eggers

"Untitled" by

Nick Swift

"Time changes everyone but specially you" by

Oliver Liria

"Untitled" by

David Paton

"Untitled" by

sararios

"Untitled" by

Kyle Gerhardt

"Untitled" by

Tania Innocenti

"Midnight Blues" by

Miguel Soll

Follow TA!

Meet 'n' Greet with the new TA staff!

Taylor A.Comment

Hi all! We are pleased to announce the addition of members to the tamer animals family! Please take a moment to get to know us a bit better. We're super-excited to launch the new blog this week and glad to have you here (new readers and seasoned veterans!)


Taylor A.
I’m a soon-to-be architect living in the Southeast with my boyfriend, Jonah, and our furkids, Lucien and Axl. In my free time I enjoy writing narratives, crafting, playing music, painting, and doing a wide variety of projects. I especially love vintage everything (especially midcentury modern!), a good cup of chai, and reading a good book on a rainy day. I used to run a vintage store, am a fashion school dropout, and love taking photographs and exploring the world. I am inspired by the photography of Horst Diekgerdes, Alex Sainsbury, and Sharif Hamza lately and am currently working with others on a project called Humans of Appalachia.  I was the editor-in-chief for paper+wire magazine and am very excited to be here doing this now. 


Denver B.
Bartender and barista extraordinaire by day. Hails from Baltimore, MD. Loves 1920’s barber shop fashion. Old world pioneer. Whiskey straight. Plays the Wurlitzer. Northern Gentleman. Living for music and good ole times. Man of few works but many words. 


Allison (Ally) R.
I’m a 26-year-old freelance artist and writer with a BFA in Design. As a North Portland-via-Los Angeles transplant, I’m currently exploring my new city and working a variety of odd jobs in the process. I really love lots of patterns and colors and hope to bring creative designs and inspiration to the table. I live with my boyfriend, Jeremy, and our dogs, Lillian and Spitz.

Maddie C. 
I am a thirty-something Atlanta native who lives in a lovingly restored 1940’s cottage with my husband Clark, eight-year old daughter Camille, and our three-year old son Casper. My chief interests are interior decorating, gardening, and cooking. I also like to craft and love to find clever ways to use things rather than tossing them in landfills. I am all about all the great places we have to eat in my city and the beautiful parks! An interesting fact about me is that I am Chinese and Irish. I'm a super-nerdy girl and an avid science fiction fan (yes, I am a Trekkie!!) 


We hope this gave you a good albeit brief introduction to our team. We're very excited for this opportunity and look forward to getting to know all of you and letting you get to know us, too! Thanks for the support, guys!


Also, don't forget to enter the drawing for the giveaway! Just a couple more days to go!! 


Love,
-the staff
Follow TA!

design therapy: make a summer arrow wreath + giveaway!

Taylor A.Comment

Hey guys! We here at

tamer animals

have been gearing up for Summer! This "wreath" was inspired by the warm weather and thoughts of summer camp (think: Moonrise Kingdom) and playing in tree forts.  We wanted something playful and fun to help capture the spirit of our favorite season. We used it to grace the entryway to our house, but it would also make a really fun wall hanging for the interior. The beauty of it is that it is super easy and fun to do!

supplies needed:

-  A set of arrows (We found our set 

here

, but you could probably use some from a sports store as well; If you buy your set at Hobby Lobby, be sure to use a coupon-- it was only $5 USD with the coupon!)

-  Three or four different colors of paint (We used just some basic acrylic craft paint (

here

), but found that t

his Patio Paint 

works best even though it is a bit more expensive)

-A matte translucent spray fixative or water-proof fixative (You can find this at generally any home improvement store in the paint section for $4-5. We used one made by Rust-Oleum)

-Paintbrushes

-3-4 different types of yarn, ribbon, or lace

- A paper plate or scrap piece of thick paper

-A pair of scissors

- A hair dryer (optional)

-Painter's tape (optional)

time:

~1.5 hours

difficulty:

pretty easy!

S1:

Once you have all of your supplies together, you can first tape off which sections you want to paint. We didn't end up taping it off because we wanted it to look hand painted, but you could use some painter's tape or masking tape if you want cleaner lines. Shake the paint containers and place a dollop of paint on a non-porous surface (we used a coated paper plate). 

S2:

Begin by painting from one end to the next (we started at the bottom of the arrowhead). Paint a light coat first and then add any additional coats until it it solid-looking.  We found it best to paint in one direction, but paint in whatever way you feel most comfortable.  It will usually take 2-3 coats, so if you want to save time, feel free to use a blow dryer to speed up the drying time. Just make sure to hold the dryer a few inches away so the metal on the arrows doesn't get too hot to touch! Since the arrows already are pre marked, we didn't have to draw on the chevron shape (you could use a marker and ruler if your set is not marked). 

S3:

Although we did different colors on alternate bands (to allow each section to dry), once dried we also painted the adjacent ones. After this, we touched up any areas that were not quite as straight as we would have liked and let those dry. Slow and steady wins the race, guys! 

S4:

Once the main layers have dried, feel free to add any other details to personalize your design. Let those dry and then take it outside (or somewhere well-ventilated) and spray it with the fixative. Let it sit for about half an hour to ensure it is fully dry before doing Step 5. 

S5:

Once everything is dry, begin cutting strands of yarn for the tassels. We just cut about 15-20 inches for each piece (you can trim them later to whatever size you need.) For the pom at the end, you can wrap a 20 inch piece around your hand several times and then tie it in the middle of the loops with the other long piece of yarn. Next, you simply cut all of the little loops open and voila! It may take a couple tries to get them the way you like them, but it goes faster once you get the first few done. 

S6:

Lastly, attach the yarn to the arrows wherever you feel they look best. We double-knotted ours, but these would be really fun to do macrame on or use a mix of different textures and materials as well. The arrows we used already have a built-in hanger, so simply hang them on the wall/door when you're done! If you end up using a different type of arrow, you can tie a loop of yarn or rope around one of the arrowheads to serve as a hanger. 

S7:

And there you have it! If you end up making one, please tag it on

instagram

under hashtag

#TADesignTherapy

! We'd love to see all the cool combinations you come up with!

That being said, we will also be giving away one custom-painted  arrow wall hanging to one lucky reader next week

(Entry deadline is 6PM EST, May 25th, 2014!)

To enter, please comment below with your personal favorite color combination and your favorite summer activity. If you're on

Instagram

, tag a photo of your favorite thing about summer(make sure to note your favorite colors in the description!!) with hashtag

#

TAarrowgiveaway

. We will use an electronic number generator to choose one of you, so feel free to enter as many times as you like between now and the 25th to increase your chances of winning!

This contest is currently open to US residents only

,

but we plan on making some additional giveaways in the future open to international readers as well.

-------------------------------------

GIVEAWAY CLOSED...we tallied the results...

And the winner is-------- (drumroll)

ADRIAN BISHOP!!

We'll be messaging you for your address shortly. Thanks to everyone that participated in our kickoff and not to worry-- we have more giveaways coming your way this month!!

Happy Summer!

 -Taylor

Follow TA!

Joyeux Anniversaire, tamer animals!

Taylor A.2 Comments

I will be turning twenty-nine this year, and the blog will be turning three! I went through recently and downsized the posts a bit to make way for a newer, more interactive blog that will combine my work, inspirations, as well as the input of other artists and musicians.

In 2008, I published a zine called paper + wire magazine. It was user-submitted and I did the majority of the project myself. I truly loved meeting so many different folks from around the world and being able to give something back to the artistic community that has been so supportive of me and my work. When I started architecture school, I simply couldn't keep up with the magazine or the blog, so it fell by the wayside unfortunately. That being said, today marks three years since I started the blog, and I would like to begin moving towards a better interface that invokes the same spirit of creativity and enterprise. The flickr group for paper + wire now has over 1500 members and 30k submissions-- it really got me thinking: "What service am I doing for the artistic community by focusing so much on the blog as a form of design therapy for myself?" When, truthfully, I would rather do what I loved: Cultivate and bring new work to the masses.

The format will be changing a bit. There will be guest bloggers, weekly/daily posts, and more emphasis on other people's handicrafts and ideas. I hope this doesn't bother those of you that do read the blog, and I will certainly continue to post about my activities and vignettes of life, but they won't be the chief focus.

Like fine wine and Tom Waits, this blog gets better with age. Please excuse the mess as I revamp everything. I truly appreciate each and every one of you that reads the posts, comments, and is part of this incredible adventure.

For information on guest posting, advertising your work, joining out team, or any other questions you may have, please contact us at

tameranimals@aol.com

.

XOXO,

T.

Follow TA!

Love the House You're In: Design Tips for Modern Living

Taylor A.Comment

This print by

Ashley Goldberg

is just my favorite. 

 So, I love our home. With its little quirks and cracks and uneven floors, I just think it is the greatest. The best part about moving to a new place is PAINTING and DECORATING and most of all: PLANNING. It has been really interesting to infuse 28-and-33 years respectively into an old, early 1900's two-story house. Out of all the rooms, my favorite is my craft room. I love having a space full of color and patterns to welcome my back after the stark minimalism of architecture school and my workplace.

Getting organized takes the longest! Hooray for IKEA, though, for helping to keep us in line. 

 I've often been asked where I find all my weird vintage stuff. The simple answer to that is thrifting, thrifting, and more thrifting. It's still super-duper easy to find unique objects for the home. I've been collecting for years and often like best the underdog objects that have scuffs and cracks and imperfections. There is a very beautiful character in imperfect things.  Designing with vintage objects is also relatively easy and can add unexpected cohesiveness to a home. We put together some simple design tips below to help get you started!:

Tip #1:

Everything Has Its Place

. Even if it doesn't look like it should go together, everything should have a place it goes. This may sound like a no-brainer, but I have a nasty habit of just sticking something somewhere because I like it and not thinking about how it complements a room (as seen above.)

Tip #2:

Go Green.

If your house or apartment has an abundance of natural light, succulents or low-maintenance plants not only add oxygen and filtration properties to your humble abode, but they also add character to your home. If you're like me and have a black thumb, get succulents (if they die, they usually come back!!!) Also, if you have pets, be sure to check out which houseplants are toxic/deadly to your furry friends. 

Tip #3: 

Create a Palette Room-By-Room. 

When I first moved in, I had to adjust my palette (my old home had mostly white walls). By placing objects that complimented the existing colors in the rooms, not only did I not have to repaint, but it added a very playful mood to several of the rooms. Pantone has a variety of tools to experiment with different color combinations, or several used book stores offer color theory books for a minimal investment. (Books like this also are great for you fashionable folk out there to plan on unique wardrobe combinations!)

Tip #4:

Get a Pet

. Not only are they a joy to be around, but they can really make a house feel like a home. 

Tip #5:

Utilize Existing Features.

If you have really unique lamps or moldings, it is easy to find ways to accent them with paint or antique-style bulbs to offset some of the modernity in a room. 

Tip #6:

Display Your Collections.

For us, our multiple bookcases were an excellent opportunity to display his rare comic collection or my vintage cameras. If you have really unusual books, sometimes displaying one or two by themselves provides a nice, clutter-free touch to a room. Display cases for more fragile things (behind glass) are also great. I am currently working on finding a way to display the fossil collection I had as a kid. 

Tip #7:

Create a Mini-Bar.

We have a lot of things in this house, but counter space is definitely not one of them. By using an existing cabinet and some spare wood, we were able to create a little coffee bar. This could also be good if you do a lot of food prep and needed a long, flat surface or if you like having a serving bar for mixed drinks during the holidays. 

We are still working hard on integrating everything, but the best part is that it is a very rewarding challenge. What are some ways you nest in a new place? What's your favorite palette ever? 

Follow TA!

Hardnight's Day Unpacking: A Newcomer's Guide to Cohabitation

Taylor A.Comment

Unpacking. The word itself brings out the dual nature of being displeased and overzealously excited in the same instant. In part, I'm really looking forward to everything having its specific place and being able to find what I need at any given point in time. On the other hand, I really hate unpacking-- it is tedious, and if things don't fit, it sort of makes you crestfallen. After you spend so much time and energy moving, it is that little annoying voice in the back of your head saying, "Hey, I know you're REAL busy and tired and all, but don't forget about me!" BOXES EVERYWHERE. However, downsizing was really great-- I'm down to roughly half of what I owned before, and my boyfriend couldn't be happier about that. 

Cohabitation is really an interesting experience. I'd been married once before, but we were teenagers for all intents and purposes, so we didn't really have a whole ton of stuff. There were no arguments about whose kitchen table to keep, why my films are boxed away in the upstairs closet (when there's plenty of space elsewhere), or wall hanging placements because we really didn't have anything. Although I'm not an expert at this or anything,  I did learn along the way some really easy tips to keep the peace and get moved in fairly easily. Many of these tips don't just apply to moving in together, but to relationships in general.

1.  

Space Out Your Move: 

If you're not moving across the country, it isn't always beneficial to move everything in one go. Since I was in the position of commuting anyway, it made sense to allow myself an entire month to go through my belongings, decide what I definitely couldn't part with (and what i could), and go through everything with my boyfriend to see if we

really

needed two microwaves or two sets of silverware.

2.

Gauge Your Partner's Moving Style: 

Although ideally, most partners welcome change, it doesn't always work out the way we envision. My partner, for example, was really resistant to having things moved around and balked at every load I brought to our new home.

This is pretty typical of folks who have lived on their own for a while

, especially if you are moving into an existing residence rather than getting a new home together. My solution, which was silly but also effective, was to move the smaller loads while he wasn't home, or not have him help me move those loads. When he only had to move some furniture and any of the heavier stuff, it cut down a lot of the tension. I then could put unpack at my leisure and once he saw the house start coming together (without me making too many major changes), he never failed to mention how it looked way better than it did before I moved in.

3.

Six Months Rule:

If you're having a disagreement over placement, colors, or certain pieces of furniture, tell your partner that you would like to try it for six months-- if they are still unhappy with it after six months, you will change it back. The key to this is that six months is a long damn time, realistically. By the time the six months had rolled around, they likely will have forgotten all about those changes and may have even grown accustomed to them or even like them now.

4.

COMPROMISE!:

That being said, you can't use the Six Months Rule with everything. Sometimes you just gotta get over that old seventies eyesore of a recliner in your living room, or the life-sized cardboard cutout of THOR in the guest room. Because whether you love these things or not, they do. And if you love each other, you have to accept the fact that cohabitation means blending your personalities together, not snuffing one's individuality out.

5.  

Do New Things Together:

This doesn't just apply to cohabitation alone, but it is so good for your relationship to do new things together and build up rituals and traditions-- it releases stress from outside influences and strengthens the bond with your partner. Moved to a new neighborhood? Go on a nature walk and document little things or trails and parks to visit. Look up a recipe together for something you've never eaten before and experiment with different ingredients. Learn about a new subject, craft, or place together. Go on a thrifting adventure (we did this a few weeks ago and had so much fun).

6.

Make New Family Traditions + Rituals:

Expanding on #5, as you begin your life together, start thinking of inventive ways to have new traditions or rituals together. For example, if you both need a caffeine fix in the morning, get up a few minutes early and make coffee together. It really helps to unwind before the workday begins and is a good way to plan out your schedules, talk about the weather, and jumpstart your day on a positive note.  Doing chores together is also surprisingly gratifying. Planning yearly holidays where you go certain places or do certain things with each other (or with family) is a great way to preserve traditions. Going to places that are important to family histories, for example, can be a memorable experience and is so much more fun to share with someone you love.

7.

Respecting Game Day

: For those of your that aren't 100% sports fanatics, Game Day can be a daunting experience. Saturdays during football season in our house take on an almost religious fervor, so I know that if I don't intend to watch football, I should plan my activities for the day accordingly. That being said, it's really good to keep the relationships you both have with friends. So, if he is having all the dudes over for beer and games, it might be an excellent opportunity to go see your girlfriends, do some knitting,  and have cocktails. :) That being said, if you have a sport you both like, sometimes it is good to be "one of the guys" and hang out and watch sports together with a whole group. We both like watching baseball and wrestling, so when those events are going on, we try to attend them when possible.

8.

Housewifing:

I would never recommend establishing a chore list necessarily, but a tried-and-true method for us is that if we see something that needs to be done (dishes, dirty floor, trash, laundry, etc), we will just go ahead and do it. My partner does the same, and this really helps keep the house clean and makes the workload manageable. While we're both not neat freaks, we both like the house to be clean and relatively uncluttered. You can also establish from the beginning who likes doing what, and switch out on occasion as needed. Some people really don't mind cleaning a litter box, while other people will throw up if they even look at it, so trading out certain tasks works well in those instances. 

9.

Mind Your Manners:  

Unless it's mutually decided, DON'T pee with the bathroom door open. DON'T walk in on someone while they're in the bathroom. DON'T leave food all over the place. DO clean up after yourself (or your pets/kids). DON'T snoop around in their drawers/cabinets. Basically, RESPECT each other's eccentricities and privacy. It's seems like a no-brainer, I know.

10.

Let Go of the Past:

When you start a new life together, you both may have trouble letting go of some things. Things I am talking about are photos of you ex-boyfriends, love letters, gifts, etc. Some of these things, of course, are okay to keep if they have some integral value to who you are as a person, or are practical (like the mop your ex-girlfriend bought for the kitchen that isn't quite on its last leg yet).  That being said, try to do a once-over of your belongings before the move-in to make sure there isn't anything too incriminating or disturbing. There's really nothing worse than going to move a piece of furniture or opening up a book and finding ten-page love letters (to or from a previous ex) or graphic photos of previous lovers (or in my ex-husband's case, a pair of underwear from the first girl he ever dated-- gross).  Just use your best judgment. If you put yourself in their shoes and think about what is acceptable and comfortable behavior,  you'll know what is appropriate and what isn't. 

11.

 Keep Your Family Close:

When I moved, a big plus is that my parents are now less than an hour away and most of Jonah's family is in-town or within a short driving distance. If your family lives near you, definitely make more of an effort to maintain those relationships and let them thrive. Just because you live together doesn't mean you're conjoined at the hip. Take daytrips, have a night on the town, or invite your folks over for a cookout. Get to know each other's families and call every chance you get just to check in with each other. 

12.

Make Music Together (or Craft, or Shop, or Whatever):

If you're both into music, start a band. If you like horror movies, maybe have a horror movie night at your place. If you like board games, have a night where you make cocoa and play Scrabble. if you both like gardening, plan a garden together. Whatever you do, find hobbies you both like and cultivate them.

13.

Get Romantic: 

Just because you're together all the time doesn't mean you should completely slack on the amorous side of things. Buy each other flowers. Write each other little notes. Do nice things for one another just because. Cuddle. Kiss each other. Get inventive in the bedroom. It seems like a lot of people settle into complacency after moving in (if you've ever farted in front of your significant other, you know where I'm going with this..), so it's really important to maintain the spontaneity and keep active in your relationship. A relationship is a lot like a painting-- a little work every day can make a beautiful picture over time. And as you add layers to your relationship over time, you can create new designs.

14.

Don't Change Each Other: 

As much as you love your partner, you don't own them. You can't make them do or think anything. So changing them is a no-no. Live by example. Live a healthy life for yourself, and if they realize they too would like to live a healthier life or don't think that is a good fit for them personally, be supportive of them regardless. If you partner has bad habits, rather than try to change them, accept that these are part of who they are. That doesn't mean you won't be bothered by them from time to time (or every time), but all the nagging in the world won't make someone change. Just love each other.

15.

Take Care of Each Other:

Also a no brainer, but if your partner is sick, it IS okay to baby them a little. Make them a hot toddy, bring them a blanket, and make sure they eat.

16.

Cultivate Yourself:

Spend some quality time yourself. If you're fortunate enough to have a room or space to yourself in the house, decorate it how you want. Invest in your individuality. Join a club, organization, or class to learn new things and strengthen who you are as a person. Love yourself. Take time out each day to do activities you love, keep a journal or blog, and if you're a spiritual person, connect with your higher power. I connect with my higher power through nature, creating, and through investigation into philosophy and history. Tapping into your strengths and intuitions can be very gratifying and keep you balanced.

17.

Balance Your Partner:

If your partner has a bad day, let them vent about it to you, and really listen to what they're saying. Pay attention to them and treat them with sympathy. If there's a crisis, put their needs before your own. Be their rock. Never be afraid to talk to each other about your troubles (but don't let them consume you, either). But also give them time by themselves if they need space. When you live together, it is extra-important to not let the little day-to-day things bring you down and try to have a positive outlook on most things. Struggles and troubles are going to happen at times-- it is the nature of life and it is inevitable-- but keeping up communication and maintaining teamwork are excellent ways to maintain balance in your relationships and in your home.

18.

Don't Go to Bed (or the Bar) Angry:

 Perhaps the biggest mistake folks make is that they let their egos override their reason-- they go to bed (or storm off) pissed as hell at their significant other. If you love someone, no matter how annoyed or mad you may be at them, don't forget that at the end of the day, disagreeing with them doesn't mean you're not still on the same side. The goal is to stay together and make a strong, beneficial relationship. If you can't deal with occasionally being pissed off at each other (major or minor stuff), why would you want to be together at all? Everyone's moody on some level, and everyone's going to blow off steam from time to time in various ways. If an argument gets too heated, take a short break and walk around the block or spend time working in another room for a bit just to cool down. Passion is a great aspect for any relationship, but sometimes it can cause problems because of the height of strong emotions getting in the way of logic and reason. Fight fair, don't point fingers, and whether the issue gets resolved or not, if you think about how sad you would be without them, don't sweat the small stuff too much.

For those of you who have (or are planning) to move in together, what are some strategies you have for maintaining the peace? :)

Follow TA!

tamer animals "asia 1960" s/s 2014

Taylor A.Comment

 It's been a crazy couple months. I'm now working my usual day job, still going to architecture school, have an internship, and am doing some projects on the side, so things have been extremely hectic!

But the wait is almost over-- I started getting my files together to make fabric, and my goal by next spring is to have a small collection going. It's called "Asia1960" and focuses on Asian mod culture during the 60's and 70's, as well as Norway's folk prints and Midcentury British Council housing.

Hope everyone is doing well! Now that school's out things will hopefully not be so sporadic. :) xoxo

Follow TA!

Design Therapy #5: Say something!

Taylor A.Comment

Design Therapy #5: Speak your own language!

I recently discovered iFontMaker ($6.99 at the Apple Store) and it is a very simple app to use. All you need is an iPad, a stylus, and a creative mind! It features several templates and the fonts work with most  software programs (indesign, pages/word, photoshop, etc!) It was super-fun creating fonts and most fonts took 15-20 minutes total to make!

If you would like to download the "Get Crafty" font, go

:

http://2ttf.com/UK8dPYlT

 If you made your own fonts and want to share, feel free to link to them on here! I would love to see what you guys come up with! xoxo

Follow TA!

Design Therapy #4: colorbook

Taylor A.1 Comment

I have a super top-secret statement to confess:

I still love coloring books

. There's something fantastic about coloring within the lines. It's the thing we learn when we're wee ones-- how to shade and color evenly and experiment with a wide variety of colors (like the 100+ packs of crayolas! Those were awesome!) But, alas, most of the coloring books these days are kind of blah. Here's a super-simple way to make your own coloring books from scratch!

DT #4 needs:

A book of tracing paper (preferably 8 1/2"x11" or around this size)

A sharpie marker or some sort of felt marker

Some cool large format books or print-outs of images or photos you would like to use (could be your own!)

A printer, scanner, and printer paper

Crayons or colored pencils

STEP ONE: Find good images you want to recreate. I LOVE Taschen books because they usually are big and have great photographs. You could also trace your own photographs or draw your own works of art. (FYI: This is  also a method we use on our model photos for architecture to do quick perspective sketches!)

STEP TWO: Lay a piece of trace over the image and trace, trace, trace!

STEP THREE: After you're finished with several images, scan them into your computer (if the scanned image looks a bit grainy, put a piece of white paper behind your image to up the contrast).

STEP FOUR: Print your pages off. If you choose to bind yours (if you're making some for the kiddos especially), Kinko's has a variety of binding services for a couple dollars to choose from. You could also just use a binder and a hole punch!

These would make great Christmas gifts for family and friends and are relatively quick to do.  If you wanted to get really creative, you could even photoshop your kids in fairy tales or other adventures for them to color! xoxo

Follow TA!

Design Therapy #3: chevron necklace

Taylor A.Comment

For this edition of design therapy, we're making a simple necklace that can be added to your wardrobe. You can also use different materials, different lengths, etc to achieve your own signature look!

DT#3 needs:

Leather or vinyl (could also use fabric-- I bought 1/8th of a yard of two colors to make multiple items)

Scissors

A marking pencil

Jewelry pliers

jump rings of various sizes

a chain

closure (optional)

a straightedge or ruler

a leather hole punch

STEP ONE: Mark the opposite side of the material with three lines. Measure, dot, and connect the lines to make chevron pattern.

STEP TWO: Cut out your design and punch hole for the jump ring on each side (I used to 2nd smallest on the hole punch, which is better for thicker fabrics).

STEP THREE: Make sure your helper doesn't walk off with your stuff (like mine did!)

STEP FOUR: If you are using other colors, mark, cut, and punch your other pieces (I tried to do different sizes for this one.)

 STEP FIVE: Connect your pieces using jump rings and pliers. (I alternated sizes to give variety).

STEP SIX: Attach chain (evenly) to the rest of your necklace. If you are making a shorter necklace that won't slip over the head, cut your chain into two pieces and add a closure before you attach the rest of the necklace.

STEP SEVEN: And you're done!

TIP: If you want to have a necklace that features two lengths, you can attach a small closure like I did somewhere in the middle to the chain, to make it shorter!

Follow TA!

Design Therapy #2: Pierced Tights

Taylor A.1 Comment

I cheated and am posting tomorrow's today (since it is practically 12am anyway), but I was just so excited to share them. These are pretty simple to make as well. They don't have to be perfect (mine certainly aren't), but I'm sure there's lots of different ways to get a similar effect with different materials. 

For DT#2,  you will need:

1 pair of tights

scissors + a ruler or some sort os straightedge

leather or vinyl (Joann's sells very good imitation leather)

Ribbon

Felt or fabric

Fabric glue + a brush, needle and thread, or fusible interfacing 

STEP ONE: Cut out a triangular shape out of the leather and then cut out a mini-triangle inside of it. I made mine around 2.5". Duplicate.  

STEP TWO: Cut 4 wide v-shapes out of a different fabric. Cut two ribbons (measure from the top of where you want the fabric pieces to where the arrowhead will sit.

STEP THREE: Glue or stitch/fuse the arrowheads to the tights, leaving a little wiggle room for the ribbons. 

STEP FOUR: Mark where the ribbons go on the tights. Glue the ribbons on. 

STEP FIVE: Decorate, paint, or embellish to create your own signature style. 

xoxo

Follow TA!

Design Therapy #1: Chevron Tights

Taylor A.Comment

For the first two editions of this adventure, I want to focus on tights. They're relatively inexpensive (I bought several cute pairs at Target for $5 each, which is well within a typical budget) and easy to do different things to. Some people bleach them, paint on them, etc. The problem is that they are super-stretchy, so if you're gluing them, make sure to get a flexible one (Aleene's makes a decent one) and make sure to try on the tights and mark where everything will go before you glue (or sew!).

Needs for DT#1:

1 pair of tights (or more, depending on how many you are making)

Scissors

A dull pencil

A ruler or triangle/straightedge

Felt or any semi-thick fabric that can be fusible

Fusible sheets (where you can iron the fabric to stick directly to the tights) or flexible fabric glue and a paintbrush

STEP ONE: Begin by marking your fabric lightly with a straightedge, in two equal squares.

STEP TWO: Split those squares into two smaller ones (I made mine different in size to add a bit of variety, but equal is cool, too)

STEP THREE: Begin marking your chevron pieces

Follow TA!

Birdseye: Portlandia and the Dream of the Nineties

Taylor A.Comment

I remember the Nineties. I remember more specifically ordering cassette tapes from Kill Rock Stars and trying to find baby doll dresses in thrift stores (which at my young age, was next to impossible.) Pacific Northwest countercultures have always held a particular fascination for me, prompting a series of events in my life potentially leading up to my retirement in the Northwest. Fred Armisen and Carrie Brownstein started the show Portlandia as a one-off series of skits called Thunderant. I doubt very highly that they anticipated the series taking off as much as it did; even I was skeptical at first at their take of my fair city. But I finally sat down to watch it. In many ways, it is a fitting statement on Stumptown culture. For me, anyway, it serves as a good example of the chemistry between two very different performers and their version of a mystical city that emphasizes the eccentricities of our culture at best. Brownstein, formerly of indie rock star band Sleater-Kinney, was one of my idols (and one of my boyfriend’s major crushes) during the Nineties. Armisen is a comedic genius who is often underrated. If you have ever seen his impersonations of various famous people (which are so numerous that the list is daunting), you will know what I am talking about. The pairing is unusual, and added to the subject matter, it greatly peaked my interest. Although, as with all things, I was still cautious about the show because of all the good and bad press it received. 

While Armisen and Brownstein’s Portlandia has garnered much lauded criticism from the inhabitants of Portland itself, I think it is important to recognize that the film version of “Portland” has as much and as little to do with the city itself as we assign to it. The same stereotypes can be attributed to many cities, not just Portland, and it seems fitting to say that their show is not necessarily capitalizing on hipster culture in a negative way; After all, if we can’t laugh at ourselves, we have very little humor to begin with. Brownstein and Armisen could both easily be called hipsters in their heyday, so in great comedic depth they are plunging into territory that

is both self-effacing and controversial.

The juxtaposition between a realistic examination of the 

limits of counterculture and our own comparative sociological interpretations of such are something semi-consciously brought to life within the show. The show is as much a statement on interpersonal relations as statement on the subterfuge of our society. The importance of establishing a dominant set of parameters for the dichotomy between trend vs. hype is clearly demonstrated in the remarkable characters they portray

onscreen. The folks that are inflamed by this can be compiled into at least three categories: 1) People who feel the city of Portland is being unjustly accused of being flagrantly ridiculous, 2) People who don’t feel it is “cool” to like a show that makes fun of what is “cool” (As one of Armisen’s characters proclaims, “That is SO OVER!”), 3) People who either don’t get the humor or just don’t care for the show. 

The fact that many of the local celebrities have taken part in this suggests that it may simply be a bit too high-brow for people who don’t see the joke. The joke is on all types of people, and should be taken with a grain of salt. I recently read a column where someone refused to watch the show after seeing the skit about polygamy and was offended that they likened this to Portland. I am a staunch supporter of PDX culture, but I saw the joke. When you look at Portlandia as being Portland and not being Portland in the same sense, it is much easier to see that they are not trying to defame the very fabric of the city, but simply make a commentary about extremes in our general current culture. It could be Anywhere, USA. Portland is just weird and quirky enough to where all of these things can apply to it, although on various levels of extremity.

The social dynamic of this is something I find very intriguing, for it beings up the eternal queries into what is hip and who we are as a culture. The social integrity is such a commentary on our values, our extremes, and what we feel circumambulates in our psyches to the sense of belonging to a collective group or isolating ourselves from it while uniformly adopting a culture. This social commentary seems to be a catalyst for examining ourselves and how we are viewed dimensionally and intuitively. The characters Armisen and Brownstein portray could fit the demographic of many people in our social strata, and I think they pull off these varying roles remarkably well. Are they simply that good of actors, or could we all possibly fit any of these stereotypes when fanaticism becomes central to our realities?

The backlash also may be due to the growing population in Stumptown proper. In the last decade, the population has nearly quadrupled. With the urban growth boundary still being maintained, property prices, taxes, and other necessities have skyrocketed. The more people move to the city where “hipsters go to retire,” the more evident the counterculture will be struggling to maintain itself and not become oversaturated with trendy countercultures that stand to suck the life out of the Portland aesthetic. Actors, musicians, artisans, and other celebrities seem more and more to be dissolving into the social fabric there as they near retirement, causing fledgling performers to seek their own entitlement on the west coast. Portland has become a transient city even moreso over the years, which can create both good and bad results. People that once loved Portland are moving further and further into the suburbs to escape from people who balk against what it was initially designed as, and jobs will continue to be scarce as the population grows within such set parameters. Five years ago, all my friends wanted to move to Portland. Five years later, half of my friends are moving back east. The more Portland grows and loses the enriching energy that made it so unique, the more I wonder if even the citizens that once proclaimed the city to being Eden will eventually say, “Portland is SO OVER.”

But to be fair, if you can land a few good jobs or a decent place to live, Portland is an amazing experience because of all it has to offer. The amount of creative energy in such a city far surpasses anything superficial that may exist within its borders. Portlandia may capture some of the more extreme aspects of western counterculture, but in hindsight I think it also has portrayed the energy of the city in a way that makes it more relatable to the masses. It has become a city of mythic proportions; while still maintaining the broad appeal of having a small-town vibe in some respects. In a city where one can generally walk or bike from one end to the other (respectively), while still within reach of the mountainous deserts and the coast, it still maintains its charming communal appeal.

Concisely, Portlandia stands as a work-in-progress—a testament to popular countercultures and stereotypes that both playfully idolizes and gently criticizes the culture that my generation sprang up from. It rejects the artistic conscience and establishes a more broad interpretation of our inclusion and subconscious drives in society. It is a clever interpretation of who we are, what is real, and all that is ridiculous. But, mainly, it is about how we relate to one another, and relate to the characters in the show itself. Season Two is gearing up, and I, for one, look forward to what Armisen, Brownstein, and their directors and writers bring to the table. 

Follow TA!